Viewing club CD contents

Forum for discussion of narrow-bandwidth mechanical television

Moderators: Dave Moll, Andrew Davie, Steve Anderson

Viewing club CD contents

Postby Andrew Davie » Sat Feb 24, 2007 12:19 am

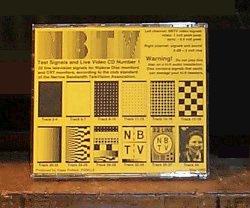
Having just received <a href="http://www.nbtv.wyenet.co.uk/cd1.htm">club CD #1</a> this seems like a perfect time to point out how to view the contents of the CD (assuming, of course, that you don't have a mechanical TV to view with!)...

Image

The trick is to use a CD 'ripper' -- software that grabs music tracks off CD (for the club CD is a true 'music' CD, only the music contains encoded NBTV video/sound). Use the ripper to grab the tracks to your hard drive in 'WAV' format. Ripper software is very easy to find and use -- I used <a href="http://www.nch.com.au/rip/index.html">Express Rip</a>, which just happened to be the first one I noted when searching.

Now it's time to visit Gary Millard's fine <a href="http://users.tpg.com.au/users/gmillard/nbtv.htm">Early Television Techniques</a> website and download the program labeled NBTV - The Big Picture! This is an awesome little program that allows us to load the sound programs that we've ripped from the CD, and view the results on our PC.

Now Gary's programming is obviously excellent, but I'm not too keen on his user-interface design. It took me a bit of playing to figure out how to get this program to work (and I still can't figure out how the one labeled 'NBTVA CD Viewer - prototype 3' works!!). I'm guessing that the CD viewer does exactly what I'm showing how to do here. Maybe. IN any case, we're going to use his other program, The BIG Picture...

After installing "NBTV - The BIG Picture", run it. First thing is to load an audio (.WAV) file ripped from our club CD. To do this, select the File->Source->Audio File option, as highlighted in this image....

Image

When you do this, a dialog will open asking you for an audio file. Select one of the WAV files you just ripped from the club CD. The next thing to do is start the video playing. To do that, click the capture button, or select from the menu Action->Capture Video (or hit Ctrl+D). The software will begin 'playing' the video, but what you see may be garbled. You should be able to correct this by playing with the controls at the bottom -- in particular, note where I have the level (labeled in white on light grey, nice!) and the Sync sliders set.

Image

That's about all you need to do -- if you want to load another audio file you will need to turn off the capture video first.

An extremely useful bit of software -- many, many thanks to Gary for writing it. I bitch about the user interface, and it surely could be better. But the software does the job I need it to do, and who am I to complain :)

Cheers
A
User avatar
Andrew Davie
"Gomez!", "Oh Morticia."
 
Posts: 1590
Joined: Wed Jan 24, 2007 4:42 pm
Location: Queensland, Australia

Postby gary » Sat Feb 24, 2007 12:57 pm

Thanks Andrew I am glad you find the application useful, sorry that you don't like the UIF design but I have been writing UIFs for many years and the one thing I have learned is that you can't please everyone. At least when writing experimental software I can afford to please myself ;-).

Just a quick clarification:

To set a source of NBTV signal select File/Source and then one of:

. Sound Card (Takes the input fed into your Sound Cards Line Input).
. Audio File (Takes the input from a B/W format NBTV wave file).
. Colour Audio File (Takes the input from a Colour NBTV wave file).
. Digital Audio Extraction (Takes the input directly from the CD in digital format [i.e. 'Rips']. Note: Presently this function only recognizes the first CD Drive on the PC).

To view this source press the "Capture" button (This is a toggle or radio type button so in means capture, out means stop capture).

When adjusting the settings (level, brightness, contrast, and sync) using the sliders it is very useful to use the 'Scope feature which displays the signal waveform rather than the picture. In this manner all of the various parameters can be optimised to the NBTV spec lines:

Line:

White - white level
Blue - black level
Green - sync slice
Red - sync tip

Once these are set correctly turning off the 'Scope should result in a (theoretically) perfect picture ;-).

Hopefully one day I'll get around to finishing this app and including a help file.
gary
 

Postby gary » Sat Feb 24, 2007 1:09 pm

Andrew, with regard to the old viewer, this version only takes signal from the soundcard. It starts capturing from the default soundcard input (WAVEMAPPER) immediately on startup. You use the PC's audio mixer to set the record parameters for the soundcard. Note you can actually play wave files using this app by playing out the wave file using any player and setting the record to be 'What you hear' (or whatever nomenclature) in the PC's audio mixer.

There used to be instructions for this app but I notice that the download link for this on the web site retrieves the instructions for the old AVI2Wav application instead. I will correct this shortly.

Note this application is still useful to those who want to view 30 line pictures and those that want to play around with gamma.
gary
 

Postby DrZarkov » Sat Feb 24, 2007 5:40 pm

It's working very fine here, too, but I have to say that clicking on "capture" was not obvious to me, too, to start it.
User avatar
DrZarkov
I think I've had a cranial implosion.
 
Posts: 1041
Joined: Mon Feb 19, 2007 11:28 pm
Location: Kamp-Lintfort, Germany


Return to Mechanical NBTV

Who is online

Users browsing this forum: No registered users and 8 guests